Create backend for Twitter clone using Node.js (express.js) and HarperDB with Heroku deployment

Hello everyone, so today we are going to build some backend API's, using Nodejs and HarperDB. For people who don't know what backend API's are let me address that first. Back end API's are basically URLs, which you build using a server-based programme like let's say Node js or Django or Flask, which is supposed to serve data to your client.
For example, let's say if we are building a Twitter-like website. So what we will do is, we will create some website on which users can see their profiles and tweets, we will get a server, which will be able to get those tweets or show tweets to the end-user from the database. A database is a place where we actually store user data. For example, when a user signs up on a website like Twitter, we store user credentials onto a database, and from the database, again you start returning the user details back to the frontend. Once a user is logged in and he or she publishes a tweet, we store that tweet data into a database and then show that to the rest of the users. So the database is a central store where we store our data.
API's are ways in which we can share the data between our database and our website. Server programmes like Node.js allow us to write such API's and share the data from our database, which is a central data store, to our end-users.
Let's talk about the agenda for this article before we start off with actual coding. We are going to use Express.js (Express.js is basically a framework on top of Node js) to build our tweets APIs. The database of choice for today is Harperdb.
I've created a design for the entire project that I'm going to build for this hackathon using Figma as shown below:-
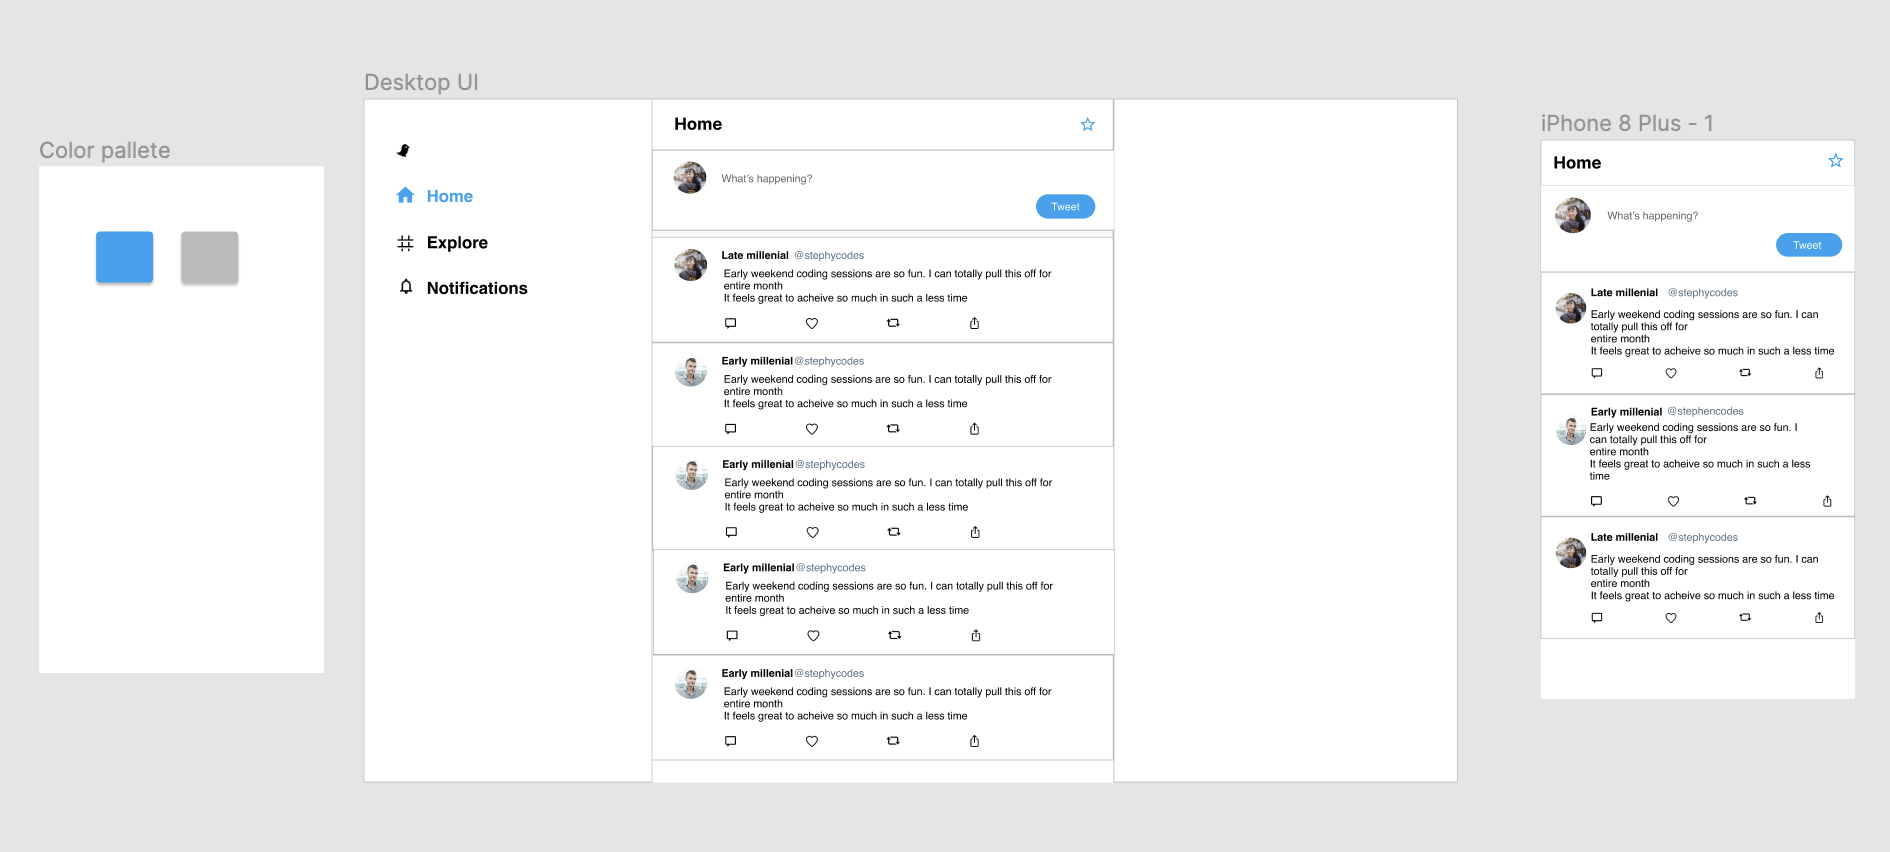
You can check out the design properly on Figma by visiting the link below:-
So we have a Twitter clone as shown above, in which the user will be able to post tweets and these tweets can be stored into a database like Harperdb. That's the overall idea of the object which we are trying to build. And in today's part, we are going to set up the backend APIs for this Twitter clone.
The prerequisites for the tutorial are Visual Studio Code, Node.js and Yarn package manager installed on your system.
So the first thing that we need is Visual Studio Code, please install it on your system if you haven't already, and open a terminal from the terminal menu.
Express server setup
Since we are using the Express framework, we are going to use a tool to generate our Express js project called an express-generator. Express generator is basically a tool that eases the process of creation of backend API's using Express, and it allows us to build a lot of files quickly, rather than doing all the stuff from our end. Let's run the below command in a folder of our choice to set up express.js project:-
npx express-generator --no-view backend
We are going to use React for our view layer and not use any view engine pre-built into the Express framework. That's why we have used the --no-view option above. backend is the name of the folder for our project.
The first thing that we do now we get into the backend folder using cd command, then we have to run yarn or npm install command to install all the packages:
yarn install
The default port for the project is 3000. So if we open http://localhost:3000/ port we will be greeted with the express welcome page on the main route as shown below.

Routes are basically the paths at which we write our API's. For example, when we are in the main route, this title Express is being served.
Similarly, we are going to build our own routes as well. Let me just go through the folder structure of files generated by the express-generator.
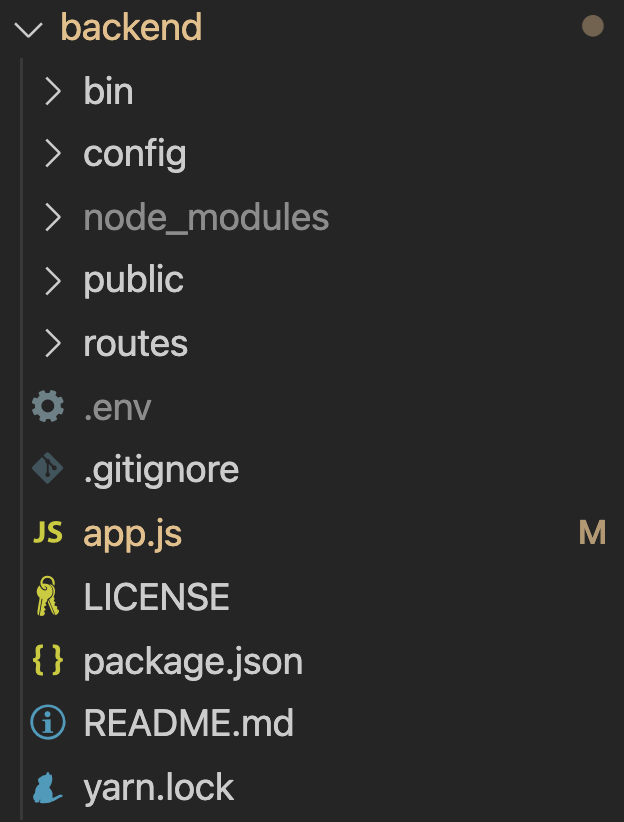
The bin folder contains the www file which is the base configuration of our express.js server. I am going to change the default port on line no 15 in this file to 5000 since I generally run the frontend server on port 3000.
The change is as shown below:-
var port = normalizePort(process.env.PORT || "5000");
The app.js file is the main entry point for our application which contains many modules required for setting up the server already installed by default. The routes folder contains the routes which need to be defined for serving data to the client and fetching data from the database.
The first additional module which we are going to install is nodemon. This module restarts our server on code changes and reflects those changes in our APIs. So I'm going to kill the server using Ctrl+C and then install nodemon using the below command:-
yarn add nodemon
Then open the package.json file from the backend folder and make the below changes in the scripts section:-
"start": "nodemon ./bin/www"
If we now run the yarn start command again, we should see our server running using the nodemon module.
Connection to HarperDB
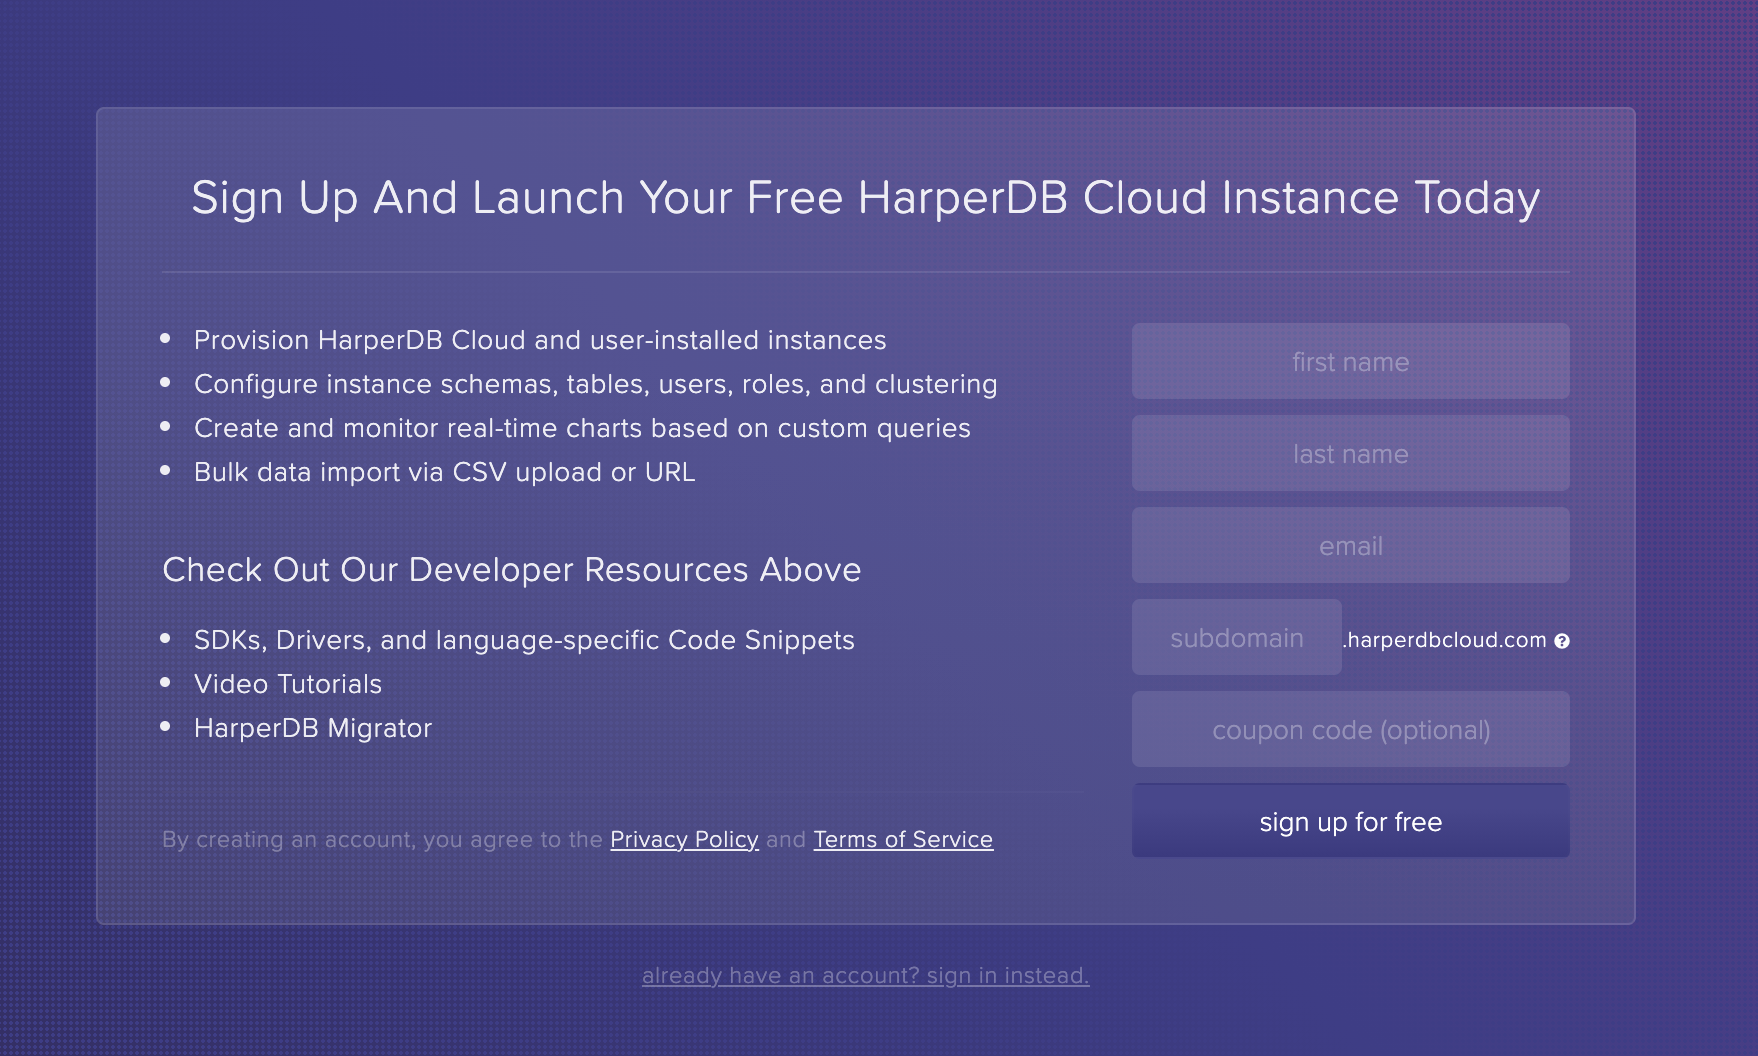
Since we are using harperdb, we need to sign up on the harperdb website. We can click on start free and sign up for an account by adding a first name, last name, email, subdomain and coupon if you have one and click on the signup button.
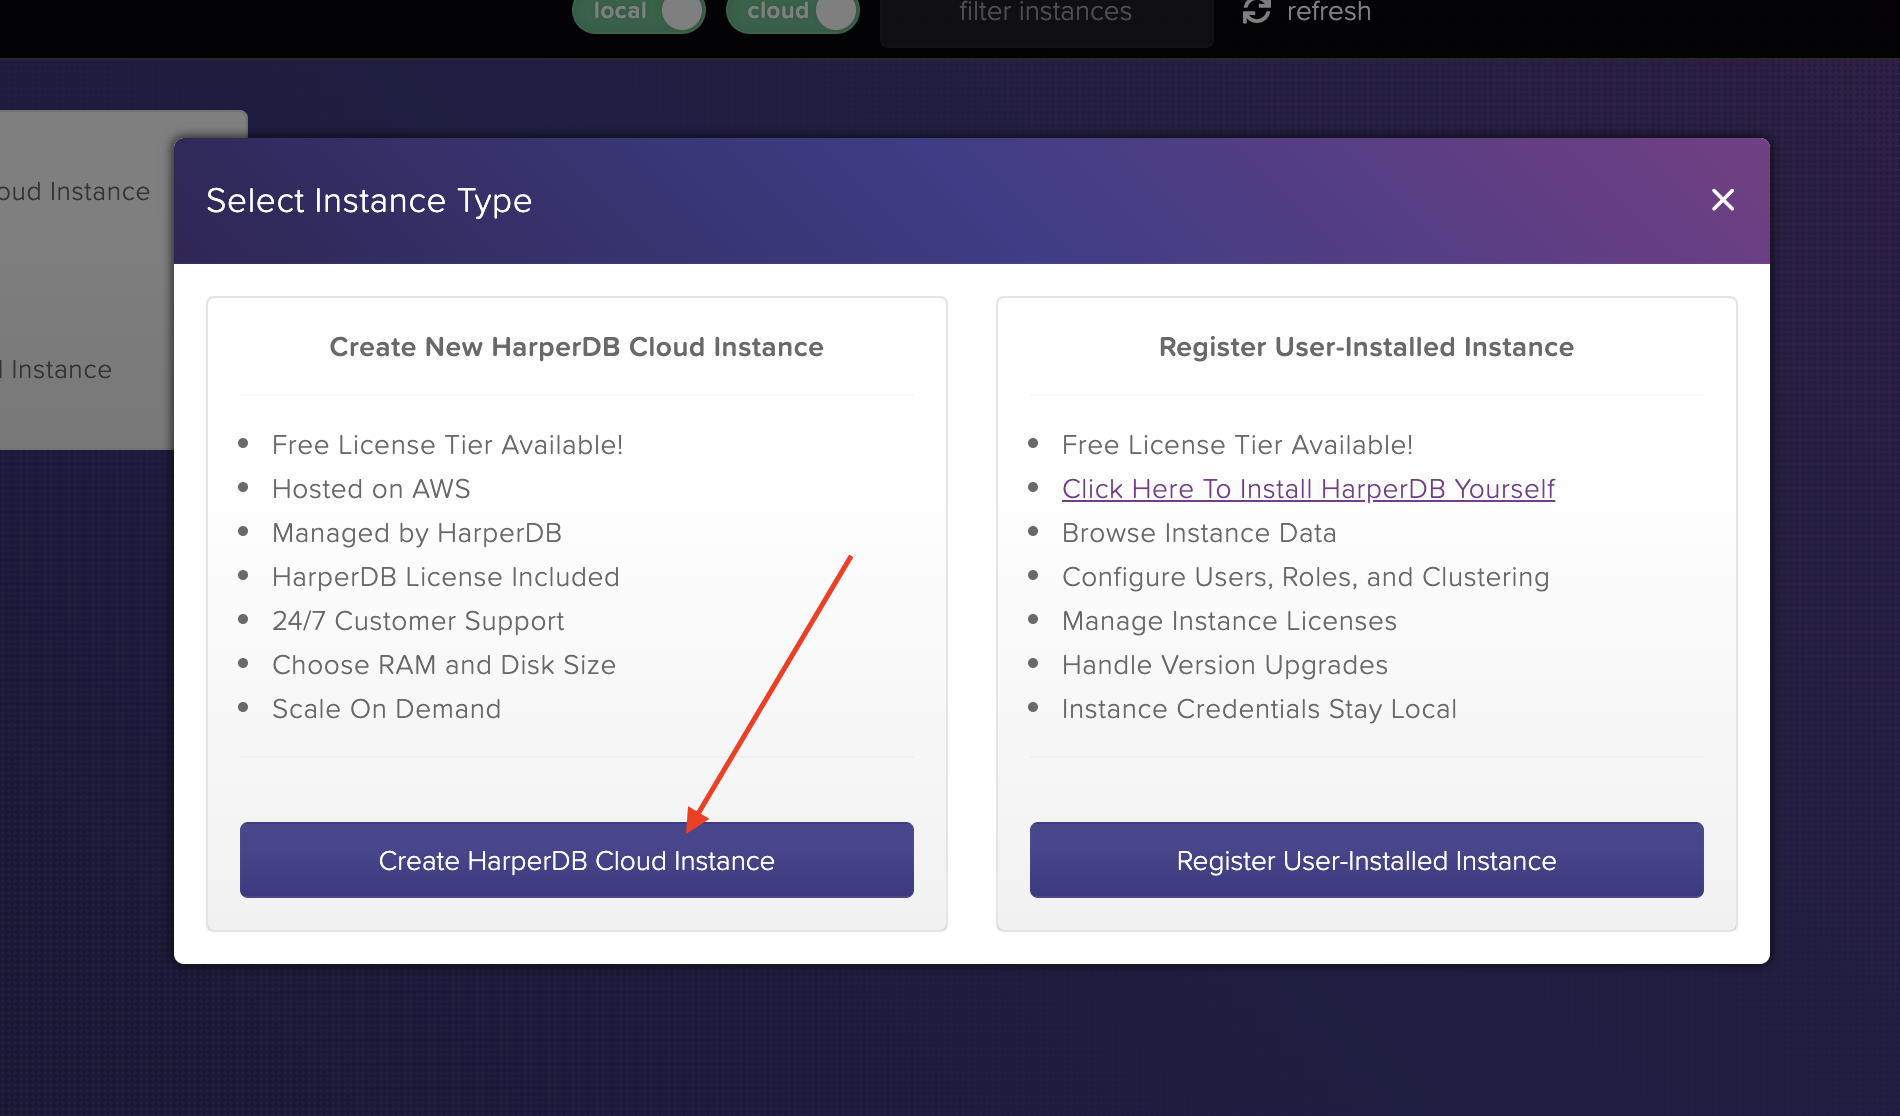
The first thing we need to do after sign up is to create an instance of harperdb. So we click on the plus icon and select the HarperDB Cloud instance option.
Then give it a name to something like let's say tweets. Then give it a username that we want and create a password. Then we'll go to the Instance Details section. We are going to use the default options and create the instance.
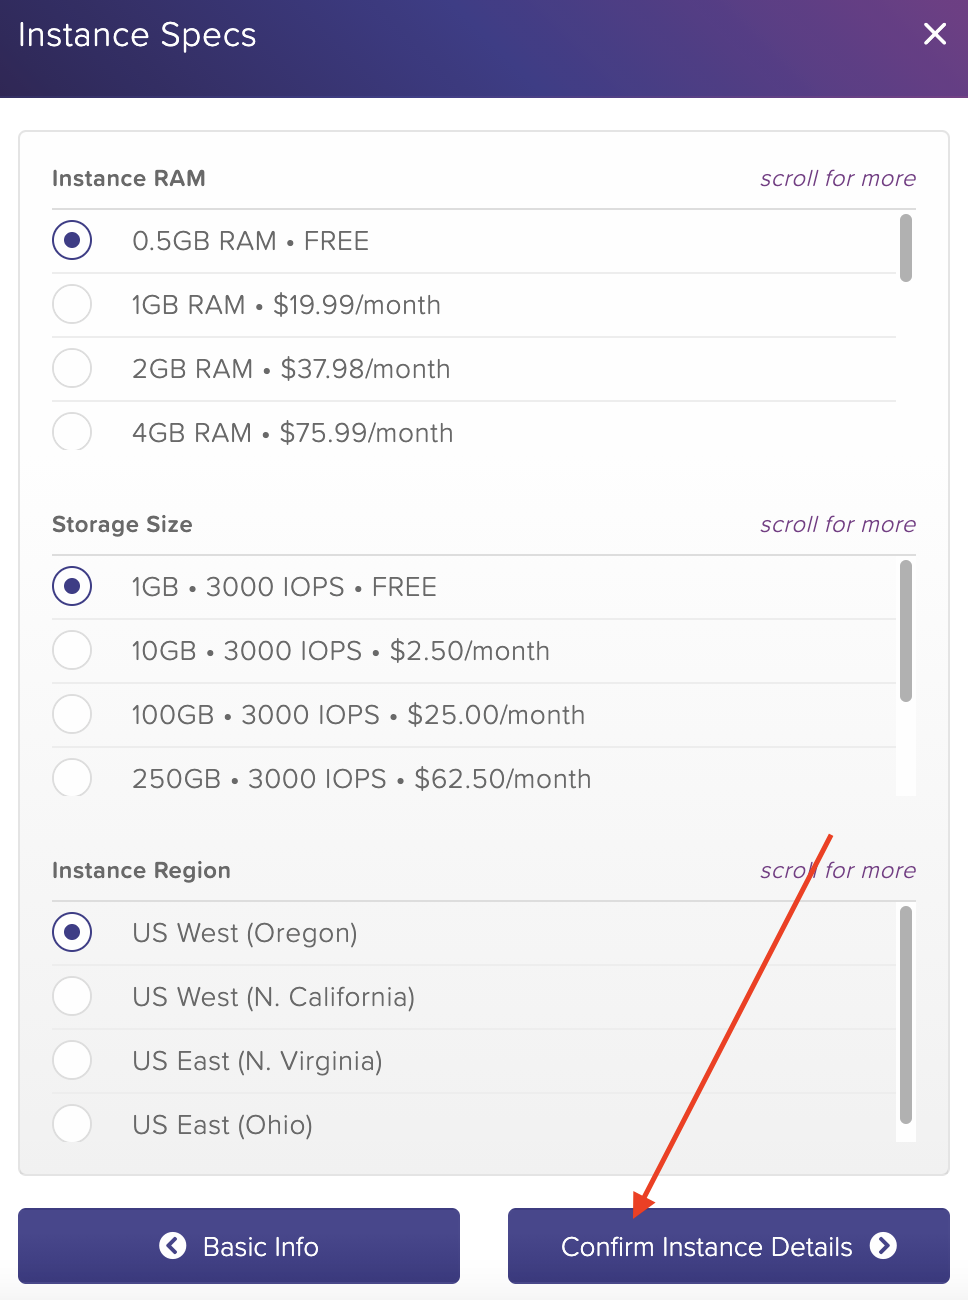
Once we have created the instance, we will be greeted with an interface for creating schema and table.
Basically, the schema is the overall design of our database within which we define our tables, or we can say this is the parent level entity within which all your entries or tables can come in and tables are basically row and columns of entries that we want to add in our data. So we are going to create a tweet schema. Then let's give it a table name to tweets as well. We need to specify an id. id is the unique identifier for our table. We are giving it a name as id and hit ENTER. We'll be greeted with a table and we are supposed to add records to this table.
We can also add additional users for the database from the users section. So this was the database creation part. Now the next step is to use this database on our server. So let's start off with, creating a config folder in our backend folder, by which we are going to make a connection to our database.
And let's create a new file dbconfig.js within the config folder. This file is supposed to store all the database connection-related information.
Since we don't want our credentials to go to the websites like GitHub where we usually upload code, we are going to use a module which is called dotenv for managing user credentials. Let's install it by running the below command in the terminal:-
yarn add dotenv
We are going to replace all the var keywords in app.js with const keywords. Next, we will include dotenv module in the app.js file:-
....
const cookieParser = require("cookie-parser");
const logger = require("morgan");
require("dotenv").config();
...
Now we can store our credentials in an environment file instead of our actual code. This adds an extra layer of security. We can store our database URL, username and password in the environment file by which it is not exposed to the outside world, and only exposing it to our server and our local entries.
Let's create a .env file in the backend folder with the following details:-
INSTANCE_URL=harperdb-instance-url-here-from-config-section-in-dashboard
INSTANCE_USERNAME=username-you-added-when-creating-instance
INSTANCE_PASSWORD=password-you-added-when-creating-instance
INSTANCE_SCHEMA=tweets-in-our-case
Next, we jump back into the dbconfig.js file. Before we add a config, we are going to use an npm module for connecting to our Harper DB which is called harperive. Let's install it by running the below command:-
yarn add harperive
Let's add database connection information in dbconfig.js by following syntax mentioned in harperive npm page:-
const harperive = require("harperive");

const DB_CONFIG = {
  harperHost: process.env.INSTANCE_URL,
  username: process.env.INSTANCE_USERNAME,
  password: process.env.INSTANCE_PASSWORD,
  schema: process.env.INSTANCE_SCHEMA, // optional params
};

const Client = harperive.Client;
const db = new Client(DB_CONFIG);

module.exports = db;
We have added optional schema param and avoid mentioning it every time we make changes to the database. Once we have the client exported or the client connection exposed, with all the connection parameters, we can then use it in our route.
We can now create a tweet.js file in routes folder of backend and actually start writing our code to populate our Harperdb database. The first thing that we can do is we can just open a sample route like users.js file in routes folder. We can take a reference from this route to write our own new route.
So we first import the express module, then the router from Express using express.Router():-
const express = require("express");
const router = express.Router();
And let's just send simple response for testing the router:-
...
/* check tweets route */
router.get('/', function(req, res, next) {
  res.send('tweets route accessed');
});

module.exports = router;
Now we come back to our app.js file and import our tweets route at the top section:-
...
const usersRouter = require("./routes/users");
const tweetRouter = require("./routes/tweet");
Next, we expose the route from app.js by adding the below line of code:-
app.use("/users", usersRouter);
// route for managing tweets
app.use("/tweets", tweetRouter);
Start the server again using yarn start for testing the URL. There is a tool which is called Postman, which you can download for testing your URLs. We can click on Create New in Postman to create a new URL test and check if our newly added route works fine:-
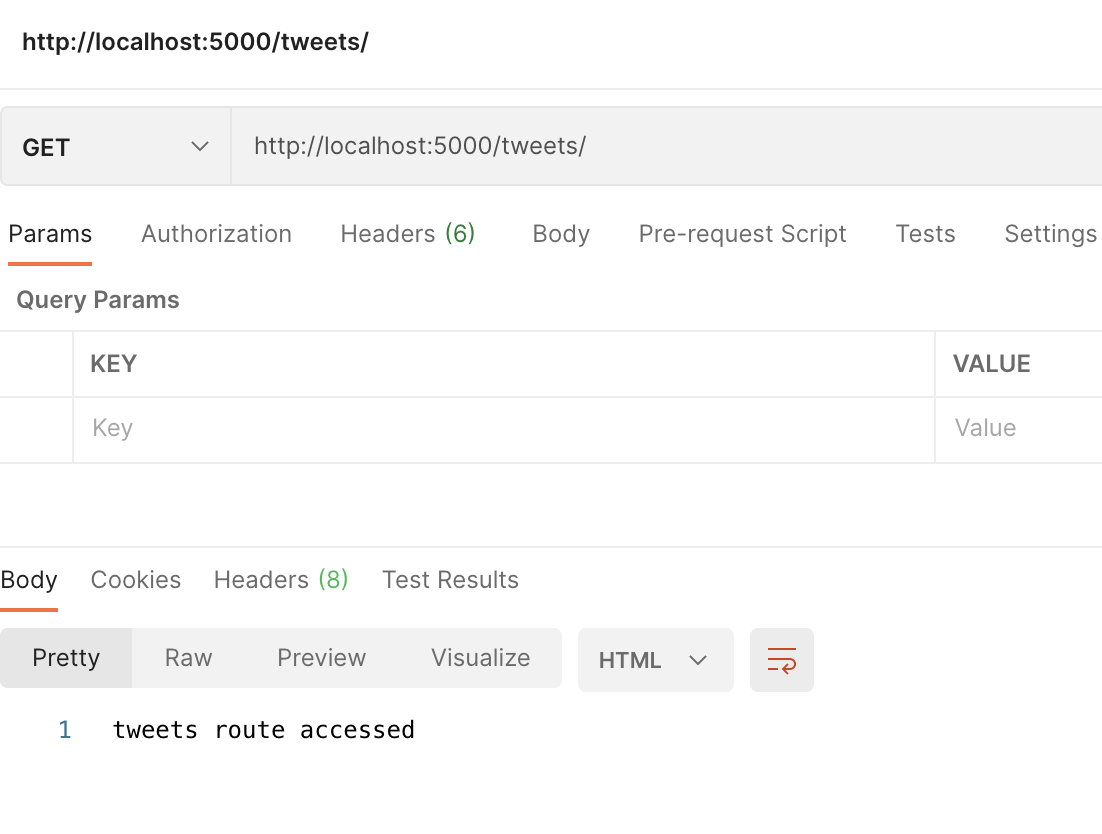
So basically that is how routes work using express and express-generator. The next thing we are going to do is to create an additional route for our tweets. The method for the route that we are going to use is POST.
If you don't know what HTTP methods are then let's try to understand them first. In any kind of server language, we have four main HTTP methods for various data-related operations. They are GET, POST, PUT and DELETE methods. The GET method is used to receive the data, POST is to create some data on your server, PUT is to update the data, and the DELETE method is used to delete the data.
So whenever someone tweets on Twitter, the tweet is sent using the POST method to the server and saved. Other users then receive the tweet back using the GET route and tweets are deleted using the DELETE method.
Now the next thing that we need to do is we need to import our config from the dbconfig.js file in our tweets route:-
const express = require("express");
const router = express.Router();
const db = require("../config/dbconfig");
Since the dbconfig is present in the config folder, which is outside our routes folder, we need to use the .. before adding the address for dbconfig in the third line shown above.
POST method route for adding tweets
We are going to send JSON, like the one shown below to our POST method, which contains user handle, user name and isLiked information along with the actual tweet sent by the user:
{
    "tweet": "This is a tweet",
    "userHandle": "saurabhnative",
    "userName": "Early millenial",
    "isLiked": false
}
This data is going to come in our request.body param within our route, so if we print out the request .body right now using the console.log statement in our route, we will be able to see the same JSON in our route as well.
....
/**
 * Route for inserting tweet into the database
 */
router.post("/add", function (request, response) {
  console.log("data recieved from client", request.body);
}
In our case, we are going to use the query syntax from harperive npm to insert a record using the data which we are getting from the Postman API. We need to use the client.insert method to insert data into the database by referring to the syntax mentioned in the docs:-
router.post("/add", function (request, response) {
  console.log("data received from client", request.body);
  const options = {
    // schema is not passed here since it has been passed while creating client
    table: "tweets",
    records: [request.body],
  };
  db.insert(options, (err, res) => {
    if (err) {
      console.log("error in insert operation", err);
      response.status(500).send({ error: err });
    } else {
      console.log(res);
      response.send({ result: "Tweet added successfully" });
    }
  });
});
If there is any error while inserting the data, the error will get printed in our console and we are also sending the error back to the client in the if(err) block so that we have a proper idea of what error is happening. We are sending success result back to the client in the else block.
There is a status code 500 added in the error block code. If there is a successful operation we generally send a code between 200 to 299, whenever there is any error we send an error code from 400 to 499 for client-side errors and 500 to 599 for server-side errors. We are using 500 which is for signalling an internal server error.
Once our insertion operation is complete, the insert method's callback functions get called with either error or the result of whatever operation has happened. So now let's come back to our postman, and let's try to send the data to the server on the /add route, and see what happens:-
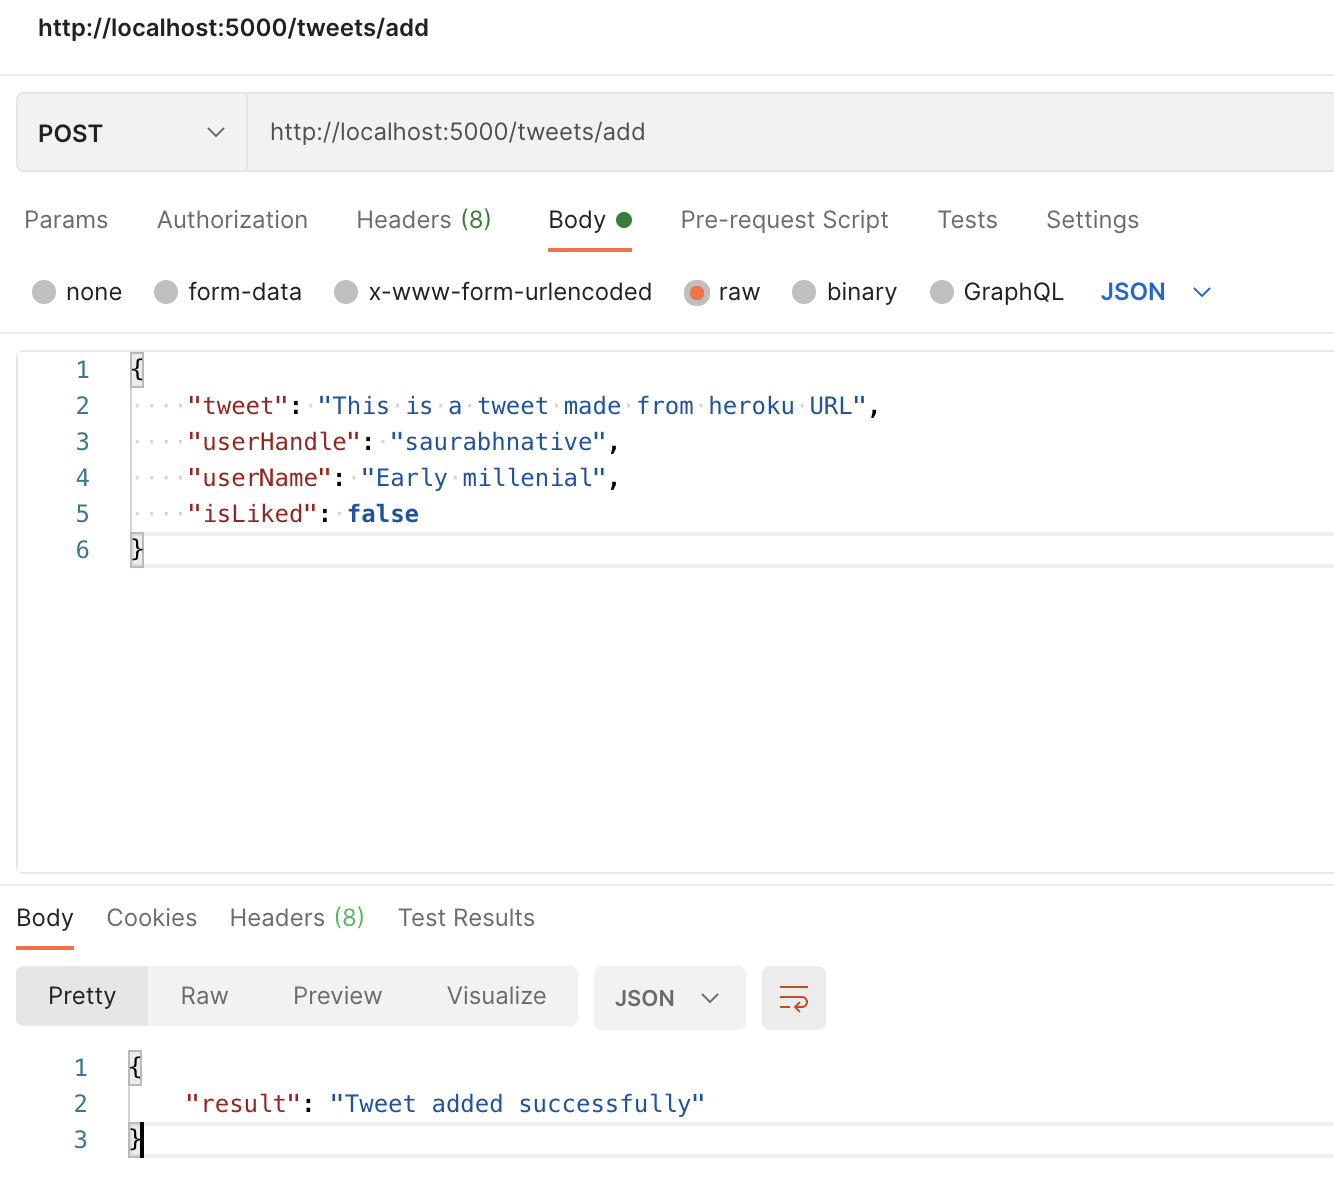
Now we have tweet added successfully as a response so the user data has been successfully added to the database. Now if we come back to our app or our database, and click on Browse. We have an entry as shown below:-

Now let's add another entry to the database using Postman and check whether the two tweets are visible in the database as well.
GET method route for retrieving added tweets
Next, we are going to create another route to get data back from our database to the client. This time we are going to use the GET method for our route since we are fetching data from the server.
/**
 * Route for fetching all tweets from the database
 */
router.get("/getAll", function (request, response) {
    // data fetching logic to be added here
}
Let's check how to get all the records from our harperdb using harperive npm. We can use the search by value option to fetch all tweets from the database. First, we define the options array with the below parameters as mentioned in the docs for the method:-
/**
 * Route for fetching all tweets from database
 */
router.get("/getAll", function (request, response) {
  const options = {
    // schema is not passed here since it has been passed while creating client
    table: "tweets",
    searchAttribute: "userHandle",
    searchValue: "*",
    attributes: ["*"],
  };
}
We specify the column from which we will be searching values in the searchAttribute option. The searchValue option is set to * since we want to get all the entries(rows) in our tables. Similarly attributes array value is set to * so that all columns from the database can be fetched.
Next, we write a function to get all data using the above options object:-
const options = {
    ....
};
db.searchByValue(options, (err, res) => {
    if (err) {
      console.log("error occured while fetching data", err);
      response.status(500).send({ Error: err });
    } else {
      console.log("result", res);
      const tweetsData = res.data;
    }
  });
Here we have again added error handling logic in the if(err) block and the result is printed on the console in the else block. The entries received back in the tweetsData object are returned one after the other in the order in which we have added them into our database i.e. the older tweets are at the top followed by the newest entries. But if we observe the actual Twitter timeline, the tweets are generally arranged chronologically viz latest tweets are shown at the top. In order to rearrange our tweets as per created time, we are going to install lodash npm in our project:-
yarn add lodash
We are going to use orderBy function from lodash to rearrange our tweets as per created time.
The __createdtime__ field contains a numeric value which is called an epoch or timestamp value as shown below.
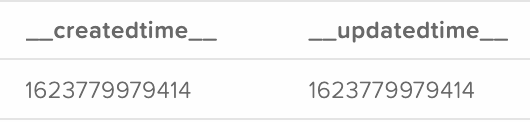
Basically, it is a numerical representation of the current date. You can learn more about epoch on epochcovertor website. For example, if the current date and time is 17th June 2021, 16:41 in GMT then numerical representation will be around 1623945861.
The future dates than this time period will have slightly higher epoch values. So if we arrange these epoch values in descending order we will have the latest posts at the top followed by older posts.
This is why we are going to rearrange our tweets as per the __createdtime__ column in descending order as shown below:-
const db = require("../config/dbconfig");
const orderBy = require("lodash/orderBy");
...
router.get("/getAll", function (request, response) {
      ...
      const tweetsData = res.data;
      // sort tweets on basis of creation time to show latest tweets first
      const sortedTweets = orderBy(tweetsData, ["__createdtime__"], ["desc"]);
      response.send({ results: sortedTweets });
}
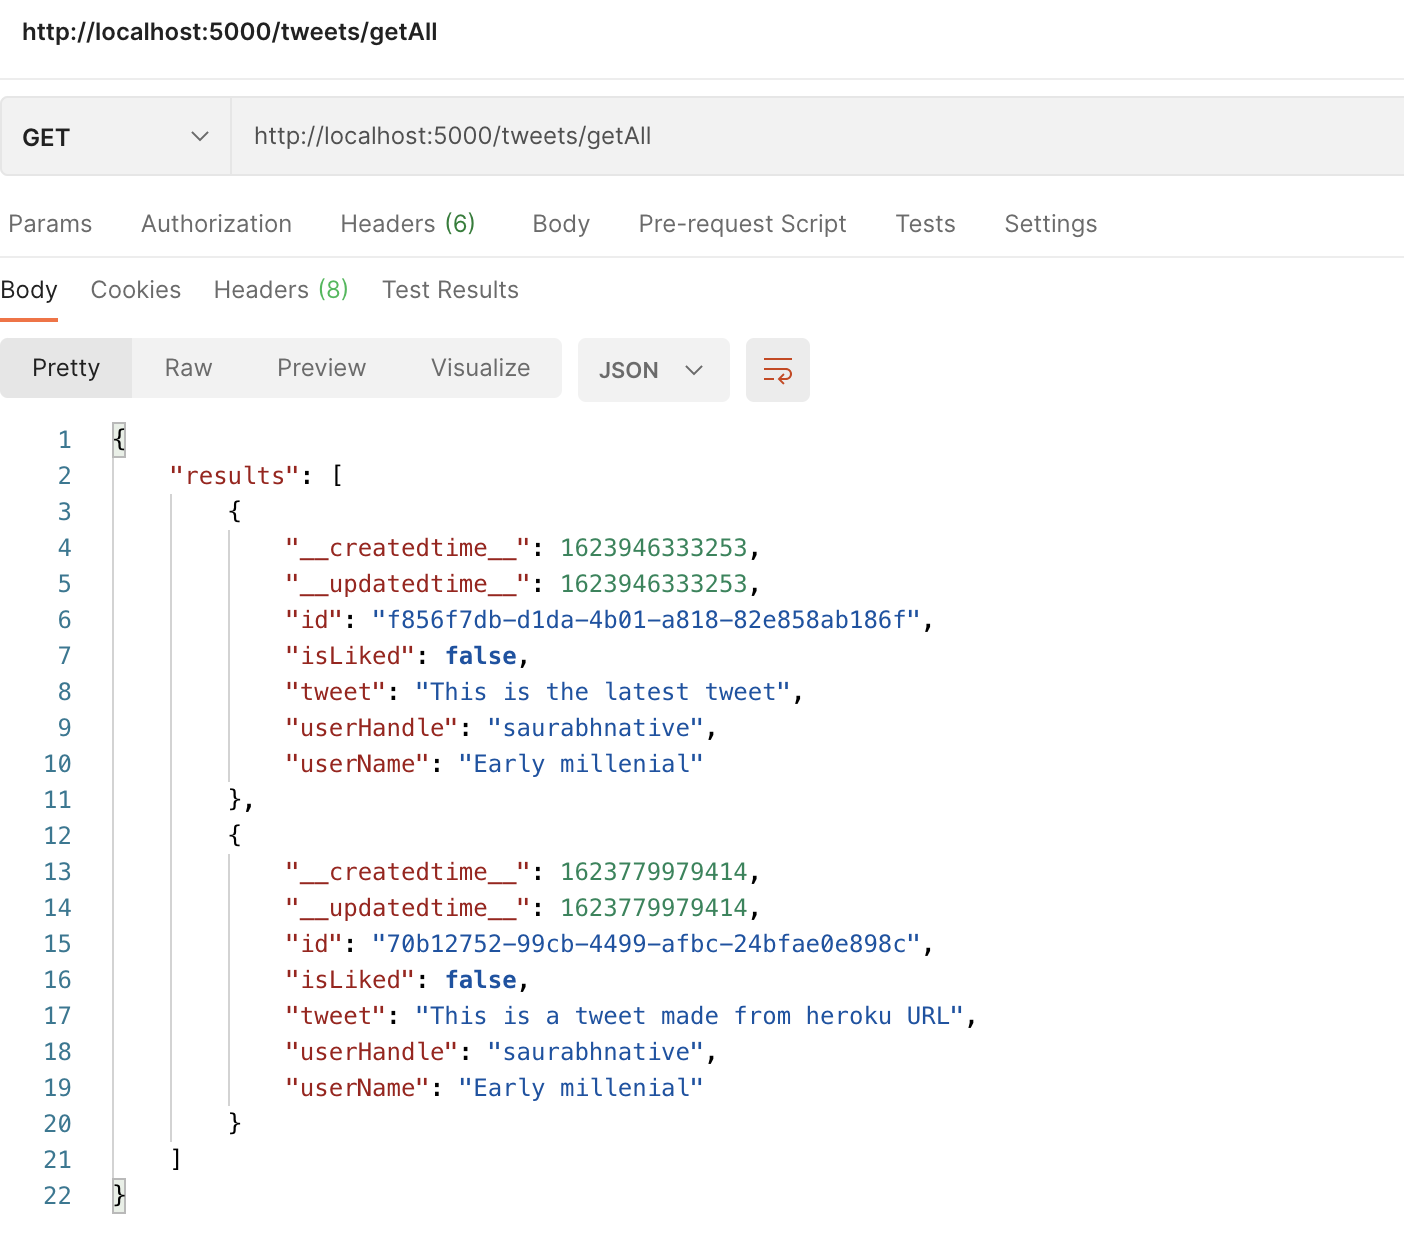
In the last line mentioned above, we sending sorted tweets back to our client. If we check the response of this API using Postman, we should get chronologically sorted tweets as shown below:-
Deployment of APIs to Heroku
Now we can deploy our application to Heroku using the steps provided in the official docs mentioned here:- Node.js deployment on Heroku.
First, create an account on Heroku if you are making the deployment for the first time.
Next, we add the engines section in package.json with our current Node.js version. I am running Node.js version 15.0.1 so the code is as mentioned below:-
"engines": {
    "node": "15.0.1"
}
We can run Heroku CLI directly by pre-appending npx command. First, we login into the Heroku website using the below command:-
npx heroku login
This command will show a prompt in the terminal to open Heroku login page in the browser. Login into Heroku from the browser and return back to the terminal.
Next, we create a new application for APIs using the below command:-
npx heroku create
Next, we need to check the default branch for our application by running the below command:-
git branch
If the branch is master by any chance we need to change it back to main by running the below command:-
git branch -m master main
Now we can push our code to the newly created Heroku application by running the Git push command:-
git push heroku main
Once the push is successfully completed, the server will get created automatically.
First, make sure to replicate the environment variables we used in the .env file into the Heroku config vars section as mentioned in the article here:- Config Vars Setting on Heroku.
It is easier to declare the variables via the dashboard option than the CLI process shown in the article. We can now test our APIs using Heroku server URL on Postman as well which finished the deployment process.
This brings us to the end of the backend API development section of our project. You can find the complete source code covered in this article in the Github repo below:-
Video tutorial
You can understand all the steps covered in this article in much more detail in the video tutorial below:-
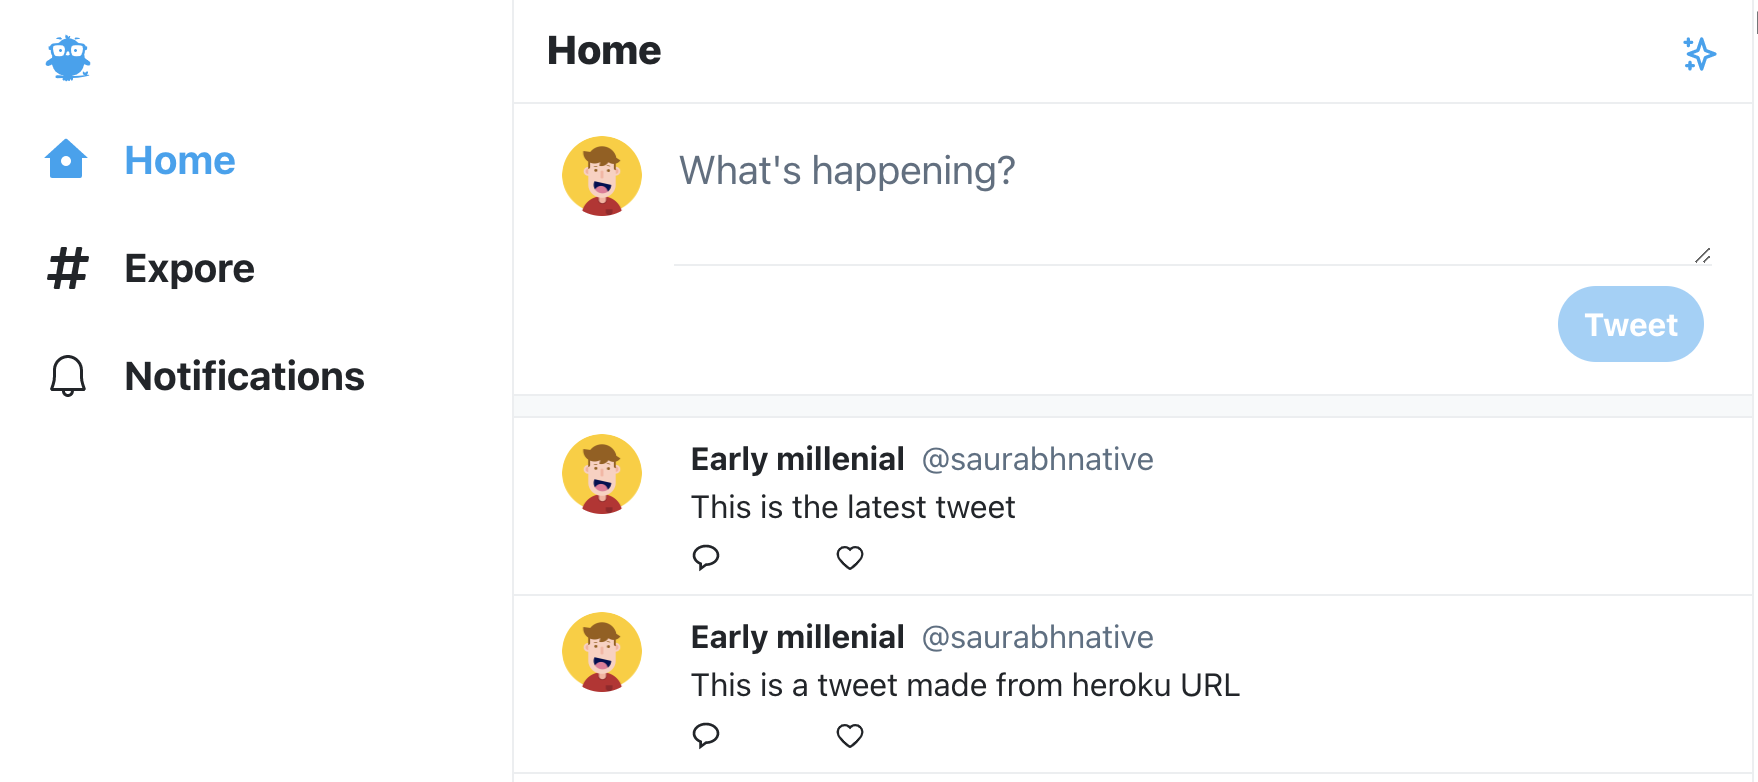
In the next part, we are going to build the frontend part of our Twitter clone as shown in the below screenshot:-
I hope you found the article useful. Which is your favourite topic covered in this article? Do share it in the comments below.
I create content about building web applications and general programming. If this is something that interests you, please share the article with your friends and connections. You can also subscribe to my newsletter or follow me to get updates every time I write something!
Thank you for reading, if you have reached till here, please like the article. It will encourage me to write more such articles in future. Do share your valuable suggestions, I appreciate your honest feedback!
I would love to connect with you on Twitter | Instagram.
You should definitely check out my other Blogs:
See you in my next article, Take care!!


