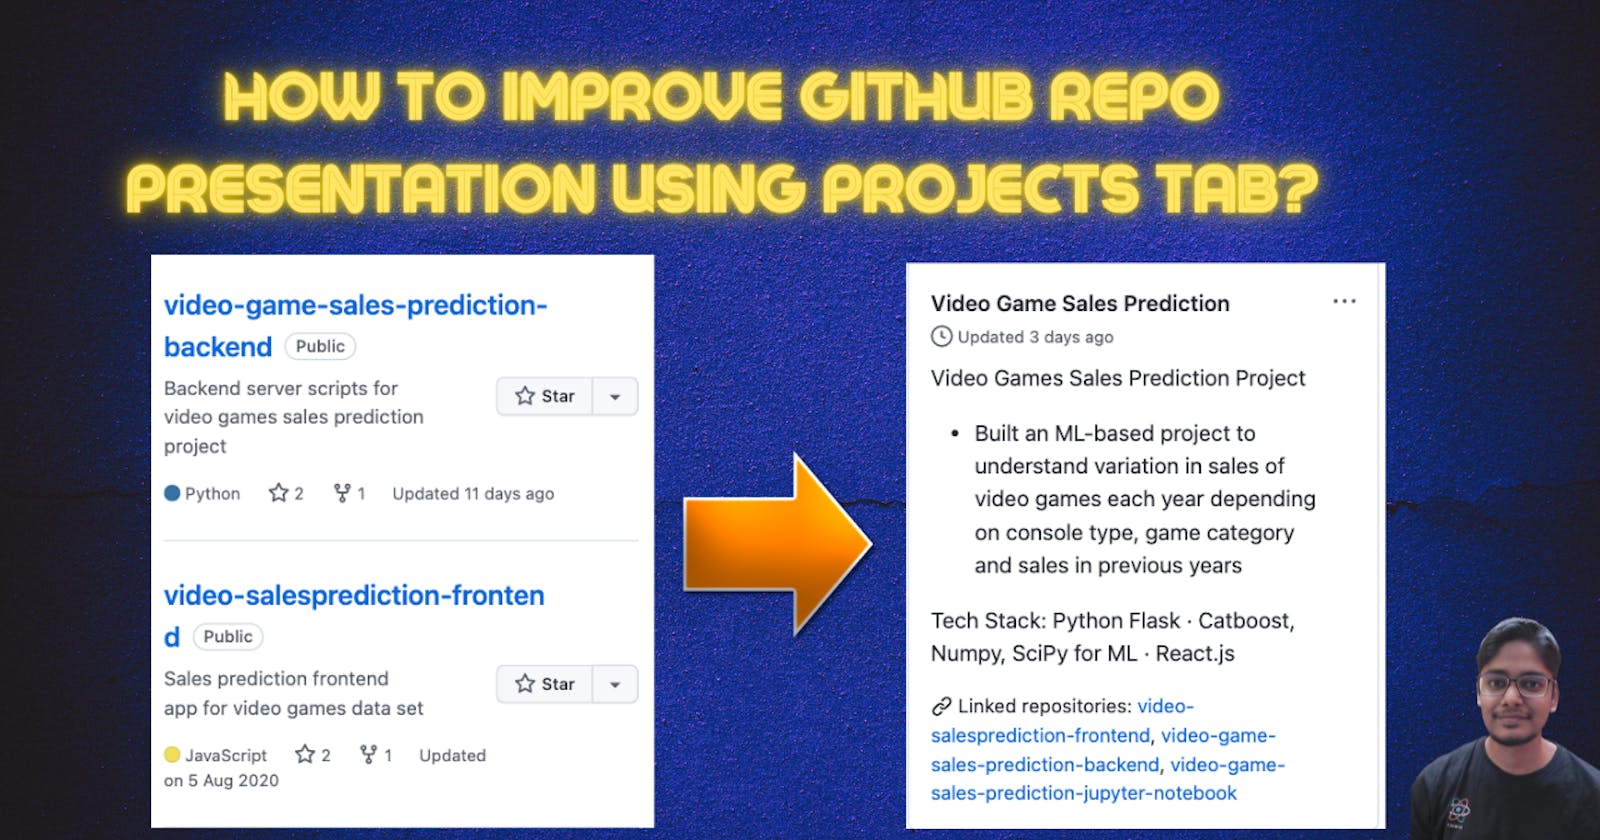


So today we are going to understand how to use the projects tab on Github for improving the presentation of your GitHub repos. Now one of the problems which it solved for me is lying in front of you. When publishing a full-stack project on Github, we usually create multiple repos for different purposes.
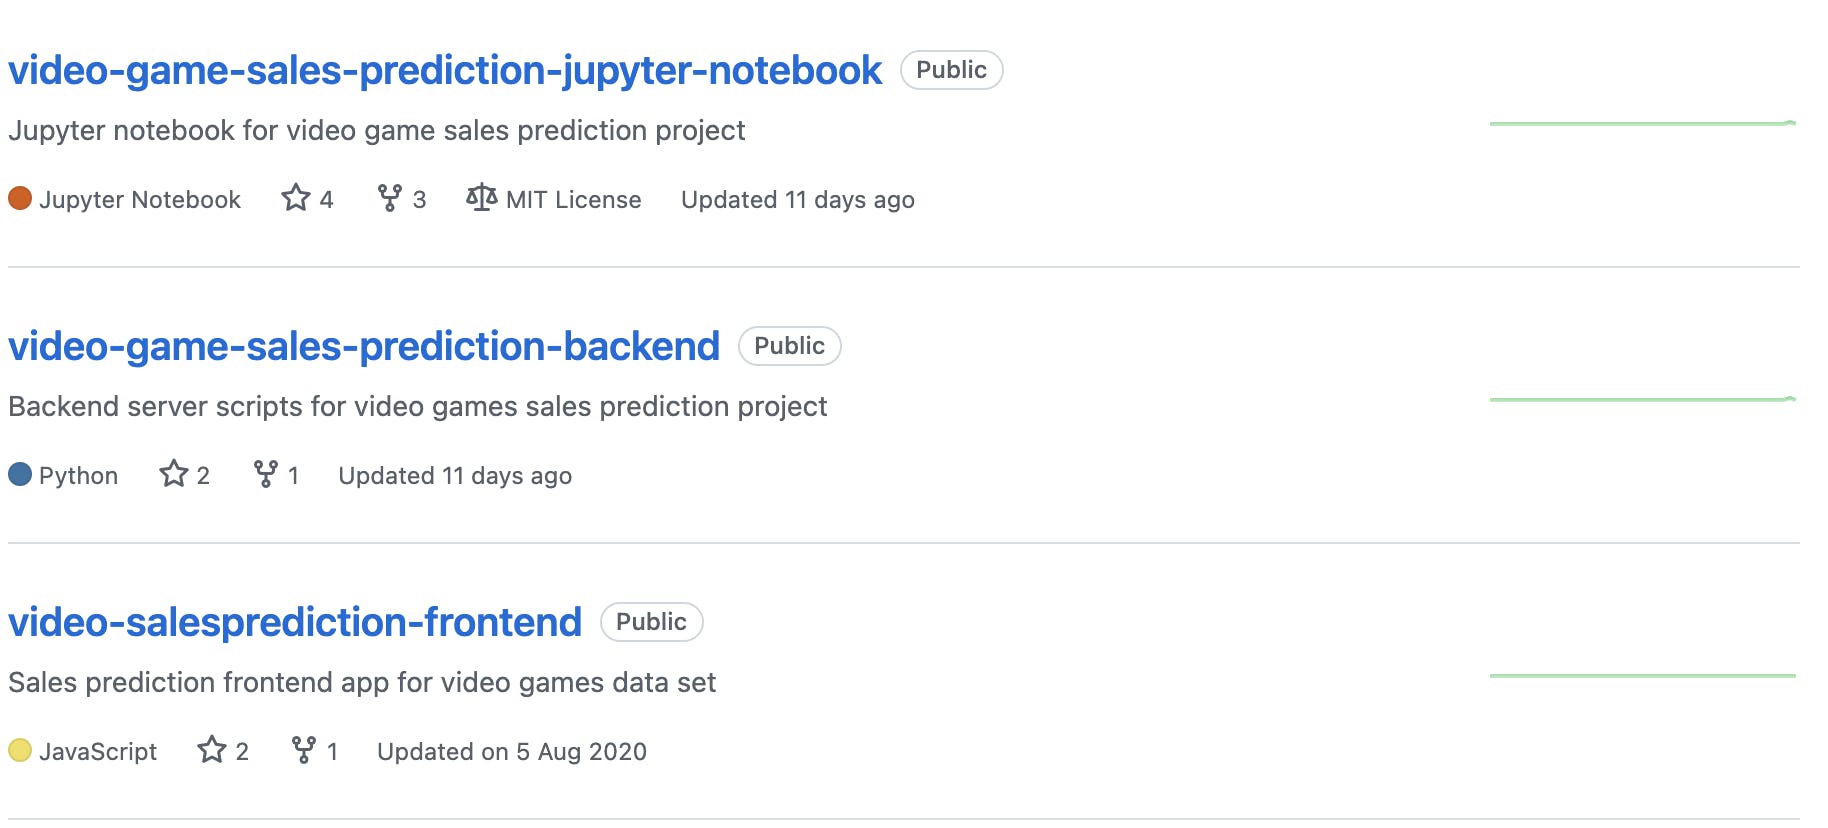
For example, in the below case, a video game sales prediction project, which contained a front end repo written in React.js, the backend repo written in Python flask and the ML notebook repo written in Python again, and I wanted to club these three repos together.
If we come to the projects section, here you can see that we have the same project presented in a different manner in which we have the three repos linked and we have a general description.

So when you are like explaining your code in front of an interviewer or showcasing your projects to someone, this tab might be a better way to showcase your projects, because you can have a basic title than a description and details about the project.
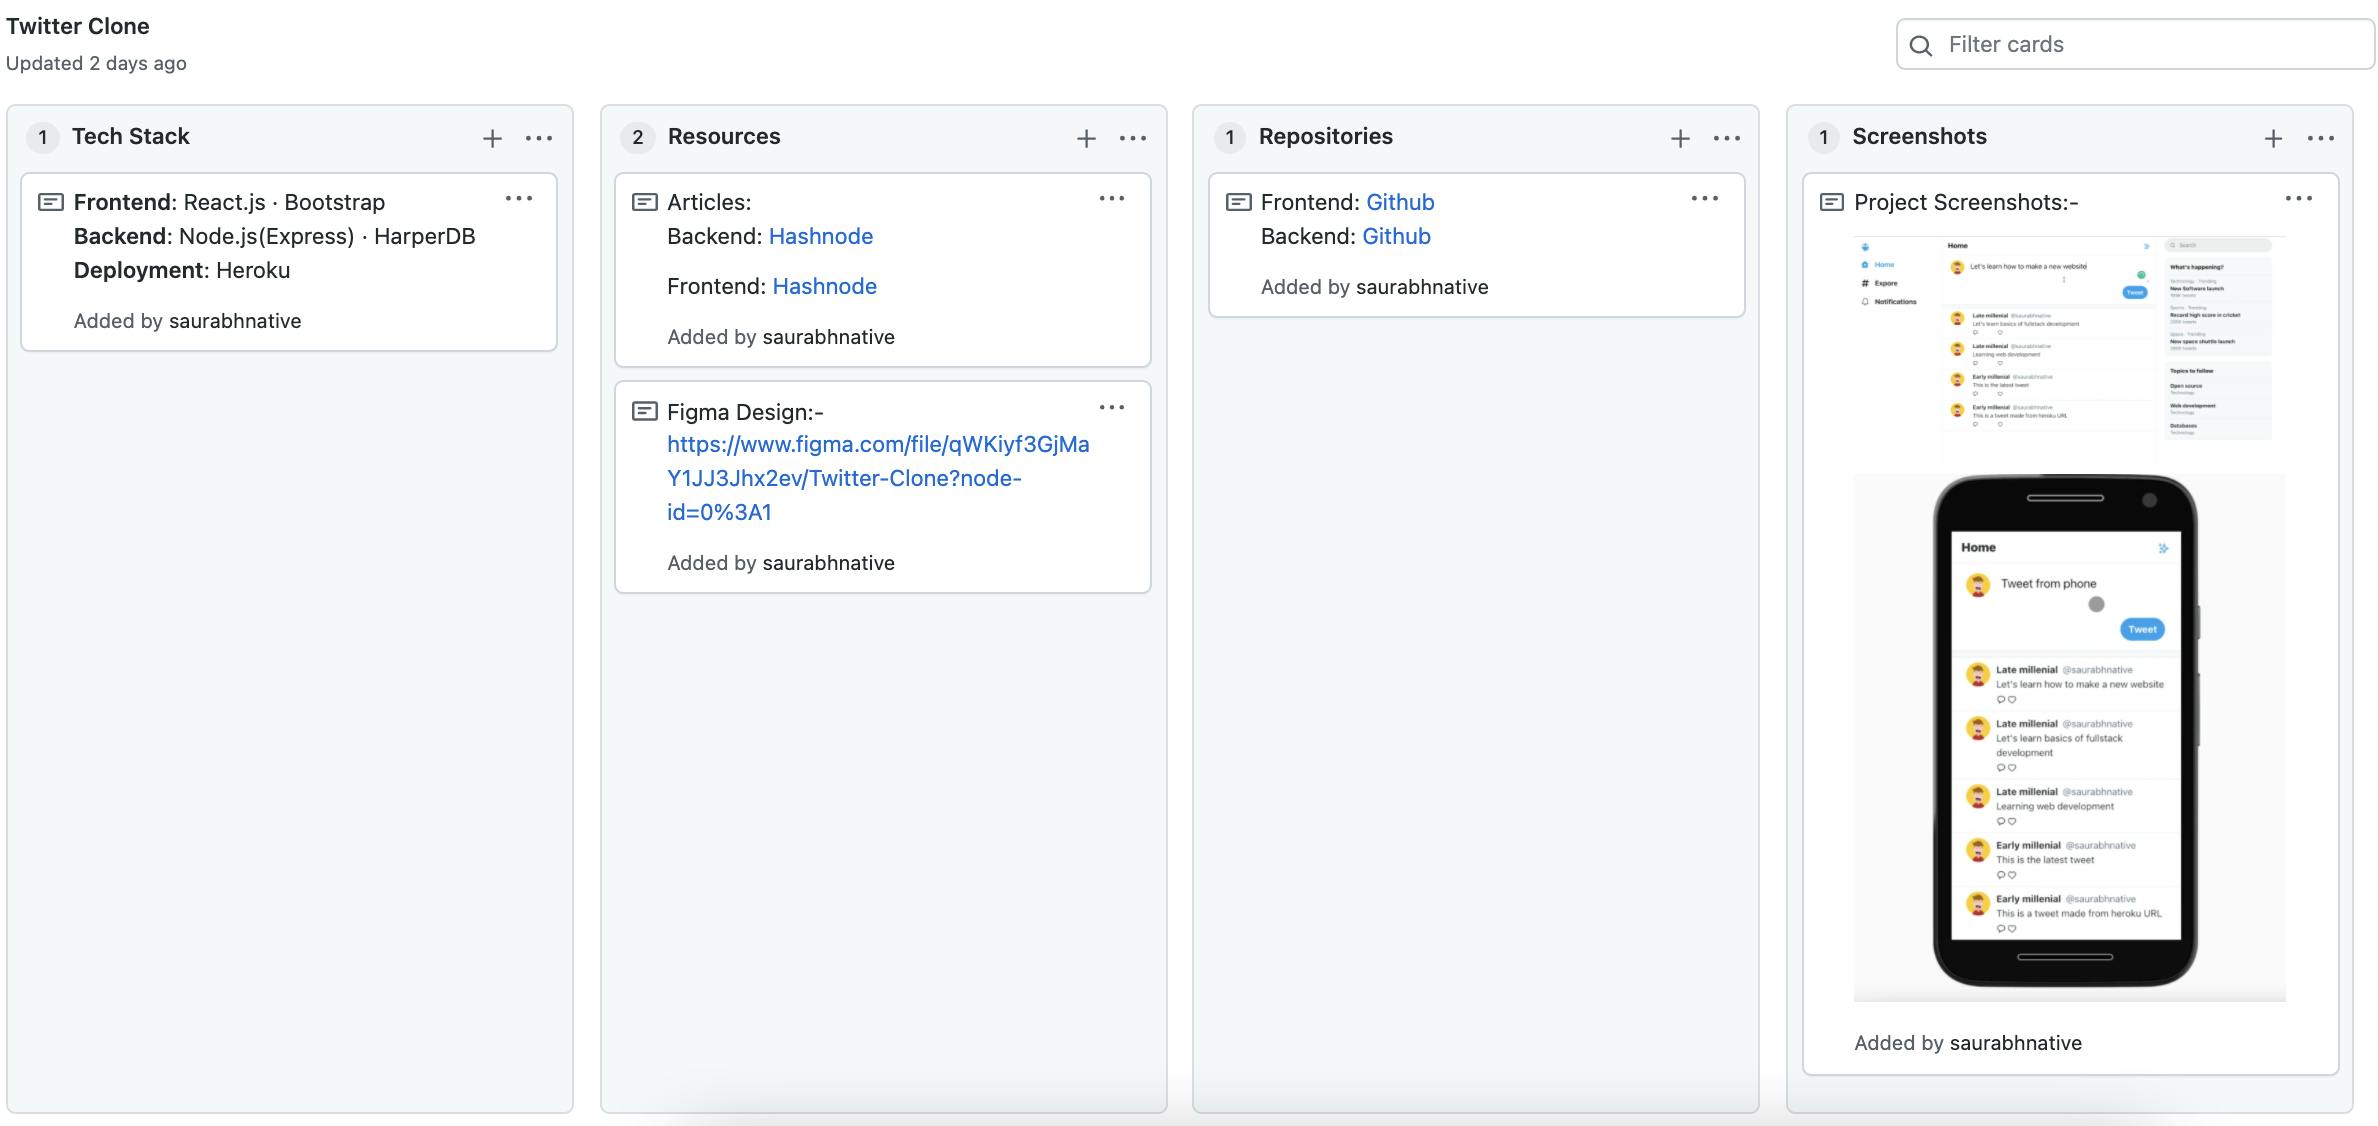
More importantly, if you click on the project inside, then you can showcase some resources related to the project. In this case, I have added the technical stack used to create the project, the links to each individual repo and the article written after finishing the project in different tabs. Now you can customise this as per your requirements as well.

Let’s deep dive into the process of creation of this project next. First, in the repos tab, filter out the repos that you need for creating the project. Once done we can start off with the project creation part.
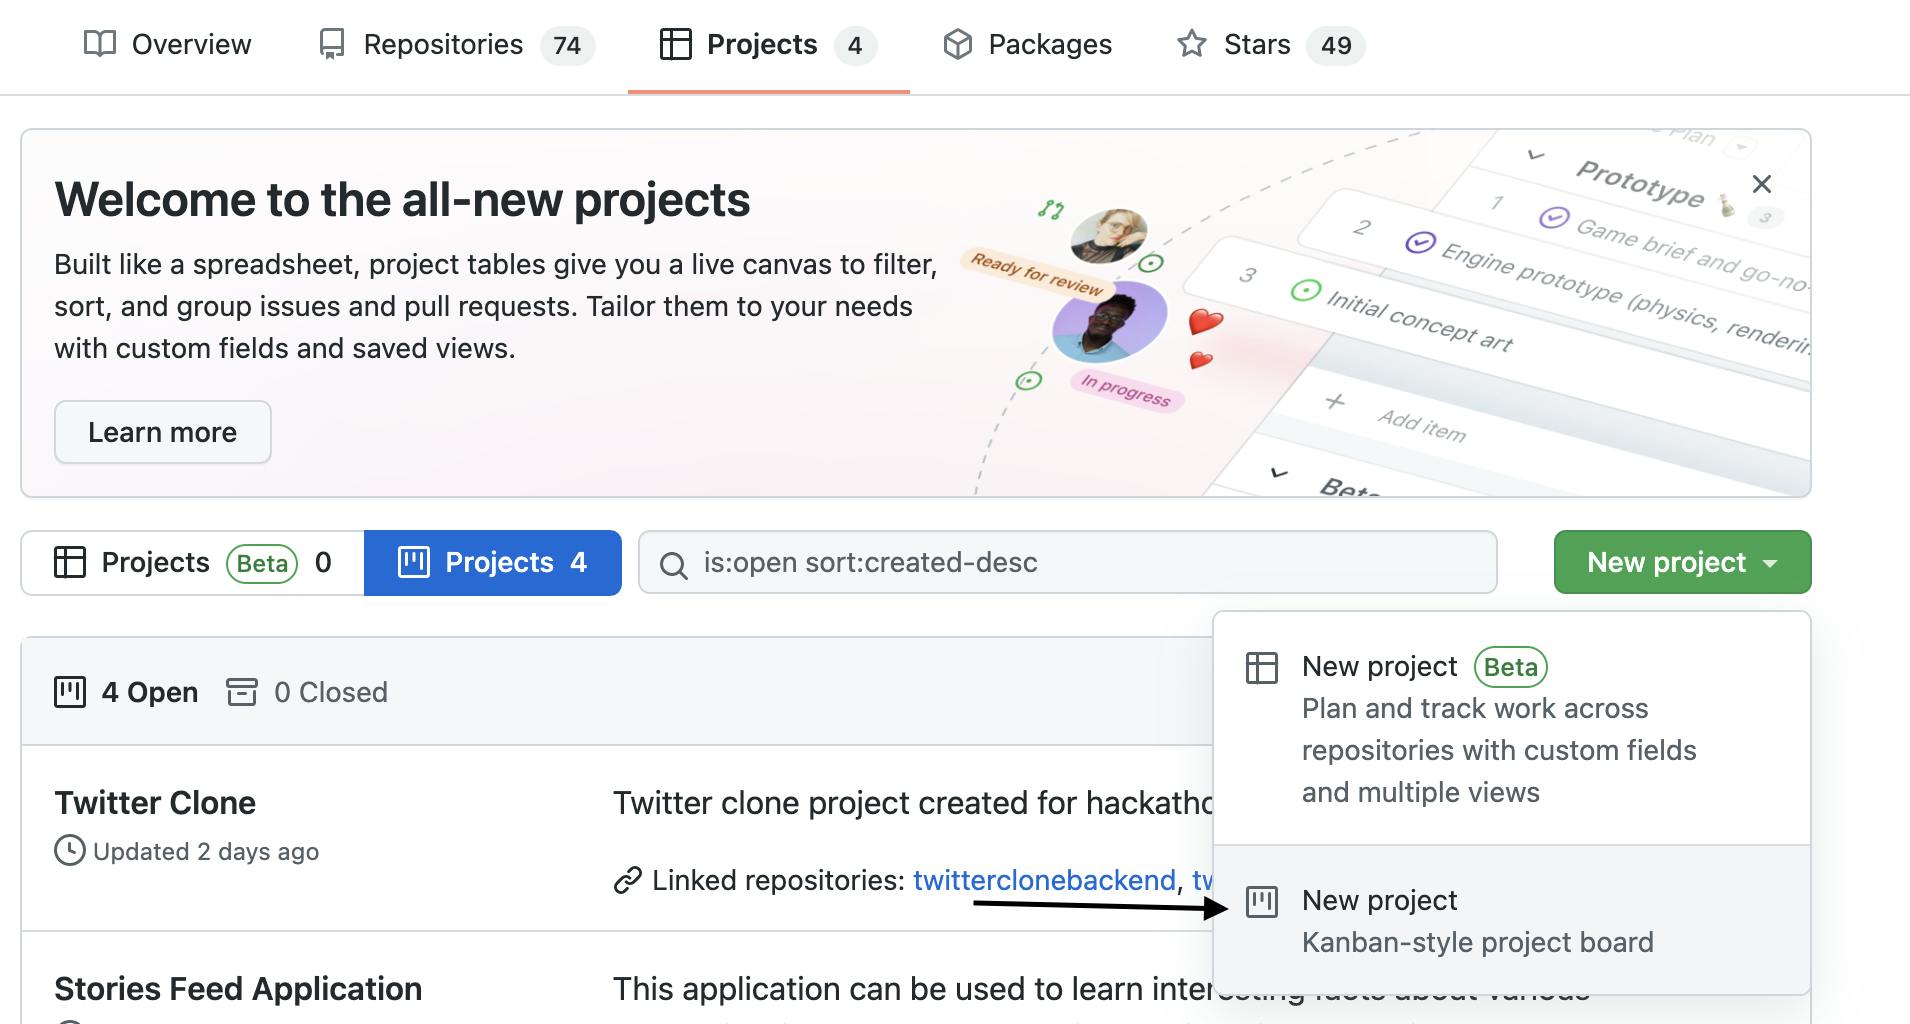
Go to the projects tab on your GitHub profile and click on new project as shown below:-
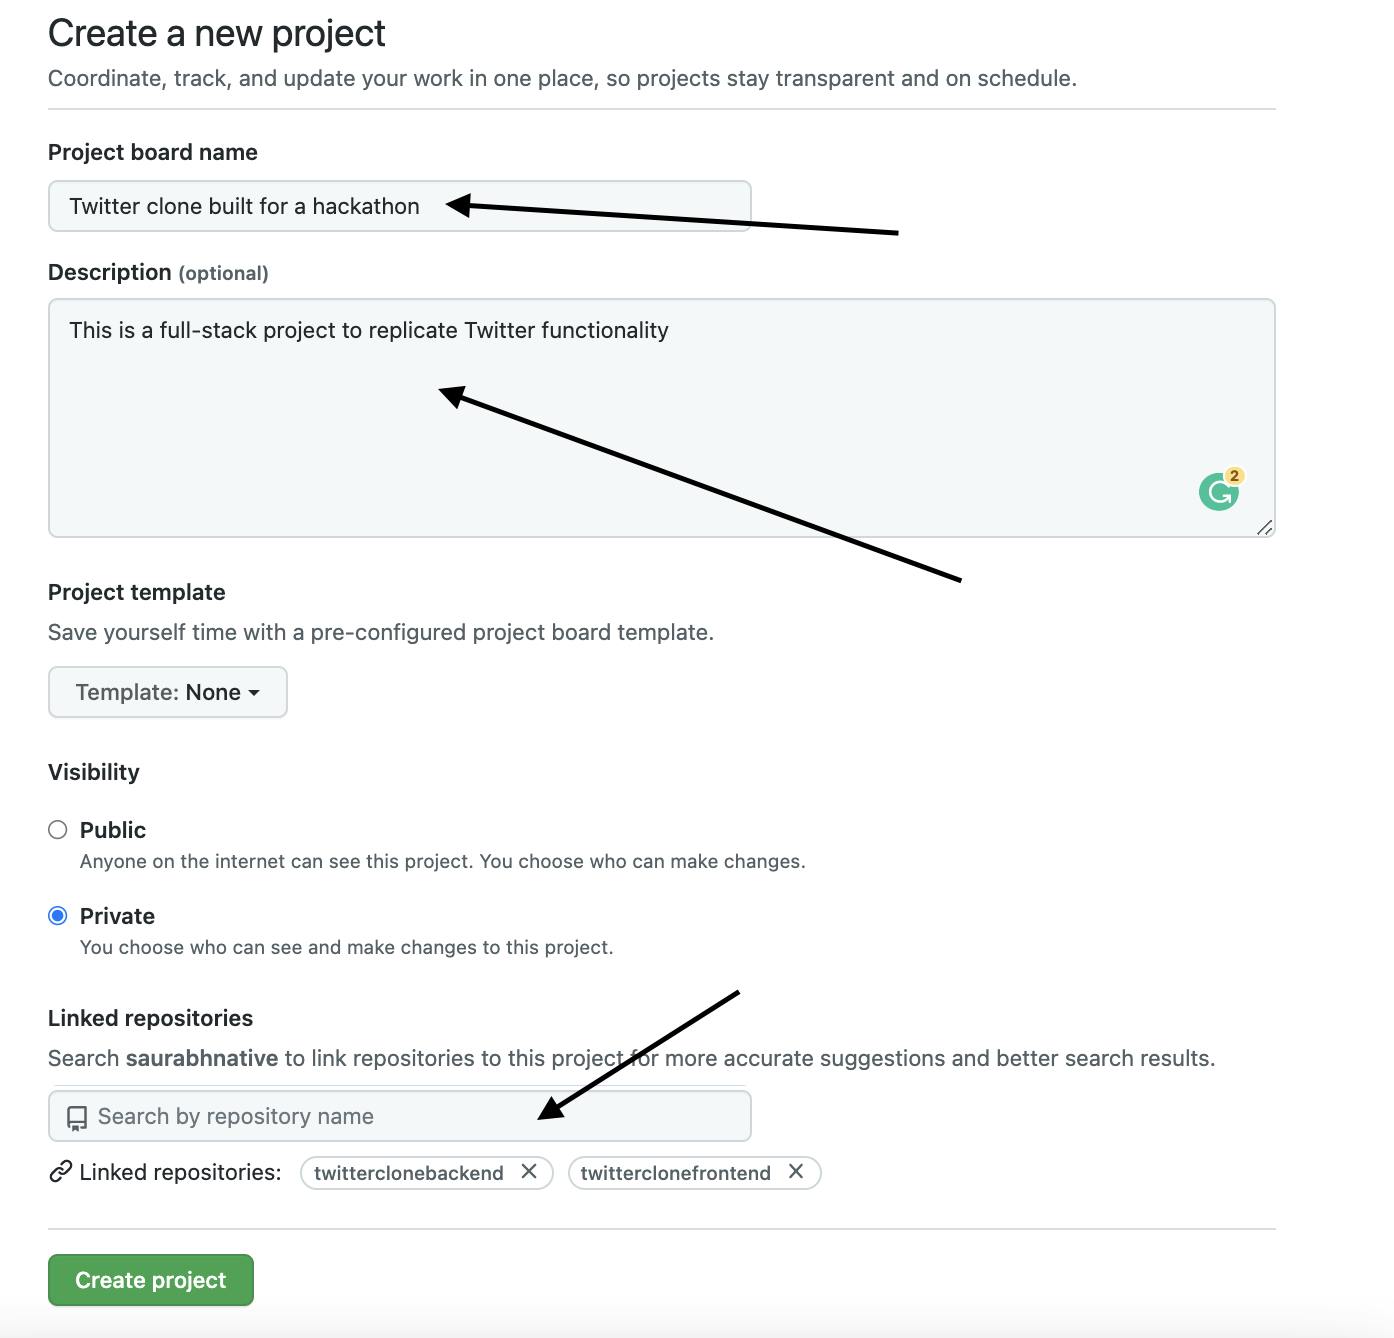
Then add a title, description and repositories you want to link for a project in the next step:-
Before proceeding ahead, keep in mind that the projects section is built mainly for task management. But this is an alternative way, in which I thought of using this section since the columns can be renamed and after we are done with the project, the task management section becomes redundant to use.
You can then add cards and column names within the project as per your requirements:-
Once done, change the project privacy settings from private to public to showcase your project with the rest of the world.
You can also go through this process visually by going through the video tutorial shared below:-
That's it from my end for today. See you all in the next article 👋